
I know, it's almost Halloween, but we all know how crazy life gets. Anyways! Little A has been very interested with all things scary lately. Boys, what're you going to do. Because of his new interest, he has been super excited about Halloween this year. Honestly, I think it's just because he can understand Halloween this year, you know, being three years old and all. And since we don't really celebrate Halloween in the traditional sense (we dress up and go to fall festivals), I wanted him to have something in the house that he could enjoy looking at.
While he's bigger, I still didn't want him having access to the decorations, since he's a hoarder. No, seriously. The kid can hoard. So really, the only option was to decorate the mantle, where he couldn't really reach anything. Which isn't a bad thing since I love decorating, and this year we actually have a mantle!
A few weeks ago, I went to some stores to check out the Halloween décor. I went to four stores, maybe five, before I called it quits. I was able to find quite a few decorations which in turn gave me inspiration. Most of the décor I purchased was from Dollar Tree. Wow, I must say, that place has cute stuff everywhere you turn! After a day or two, I had my mantle all set up!
Little A loves it! So do I, it's simple yet decorative. Can you believe this whole mantle only cost around $20??? It makes it that more appeasing!
Fun fact, this owl will be going to Little A's room once Halloween is over. His room is woodland themed and this way, we can reuse some Halloween décor before next year!
I tried to purchase as few things as possible to achieve this look without sacrificing the appeal. In order to do so, I had to come up with a couple of ideas at the last minute. Before I decided to add the branches, I didn't even think of a vase at the store. Of course, things change, and I was left without a vase. I didn't have time nor wanted to go over my budget of $20, so I had to think of something quick! Queue the VOSS water bottle! I had two of those bottles lying around, and some of Little A's fingerpaint. I put two and two together and voila, water bottle turned vase!
It was simple to make the vase, really. I used a box cutter to carefully scratch off the wording on the outside of the bottle. I gave it a quick wash. I still wanted the glossy look of the outside, so I poured the black finger paint inside the bottle and spread the paint around by slowly turning the bottle. It worked like a charm. I let it dry for a day, but if you are looking to do the same, I'd say give yourself a few days for the paint to dry! Even after drying for a whole day, it was extremely wet inside.
The sticks were free, from outside! Little A and I went on a nature walk and picked up quite a few sticks. He loved the nature walk, and I loved coming up with a whole section of the mantle that cost me nothing!
He's staring at you!
My last project for the mantle was to use a little bibbity-bobbity-boo (tee hee) on the pumpkins and transform them into...matching pumpkins!
I mentions before about the B-I-N primer, and let me tell you, still loving it! To save even more on costs, I didn't want to purchase any more paint. I already had some anyways which would hide the colors underneath.
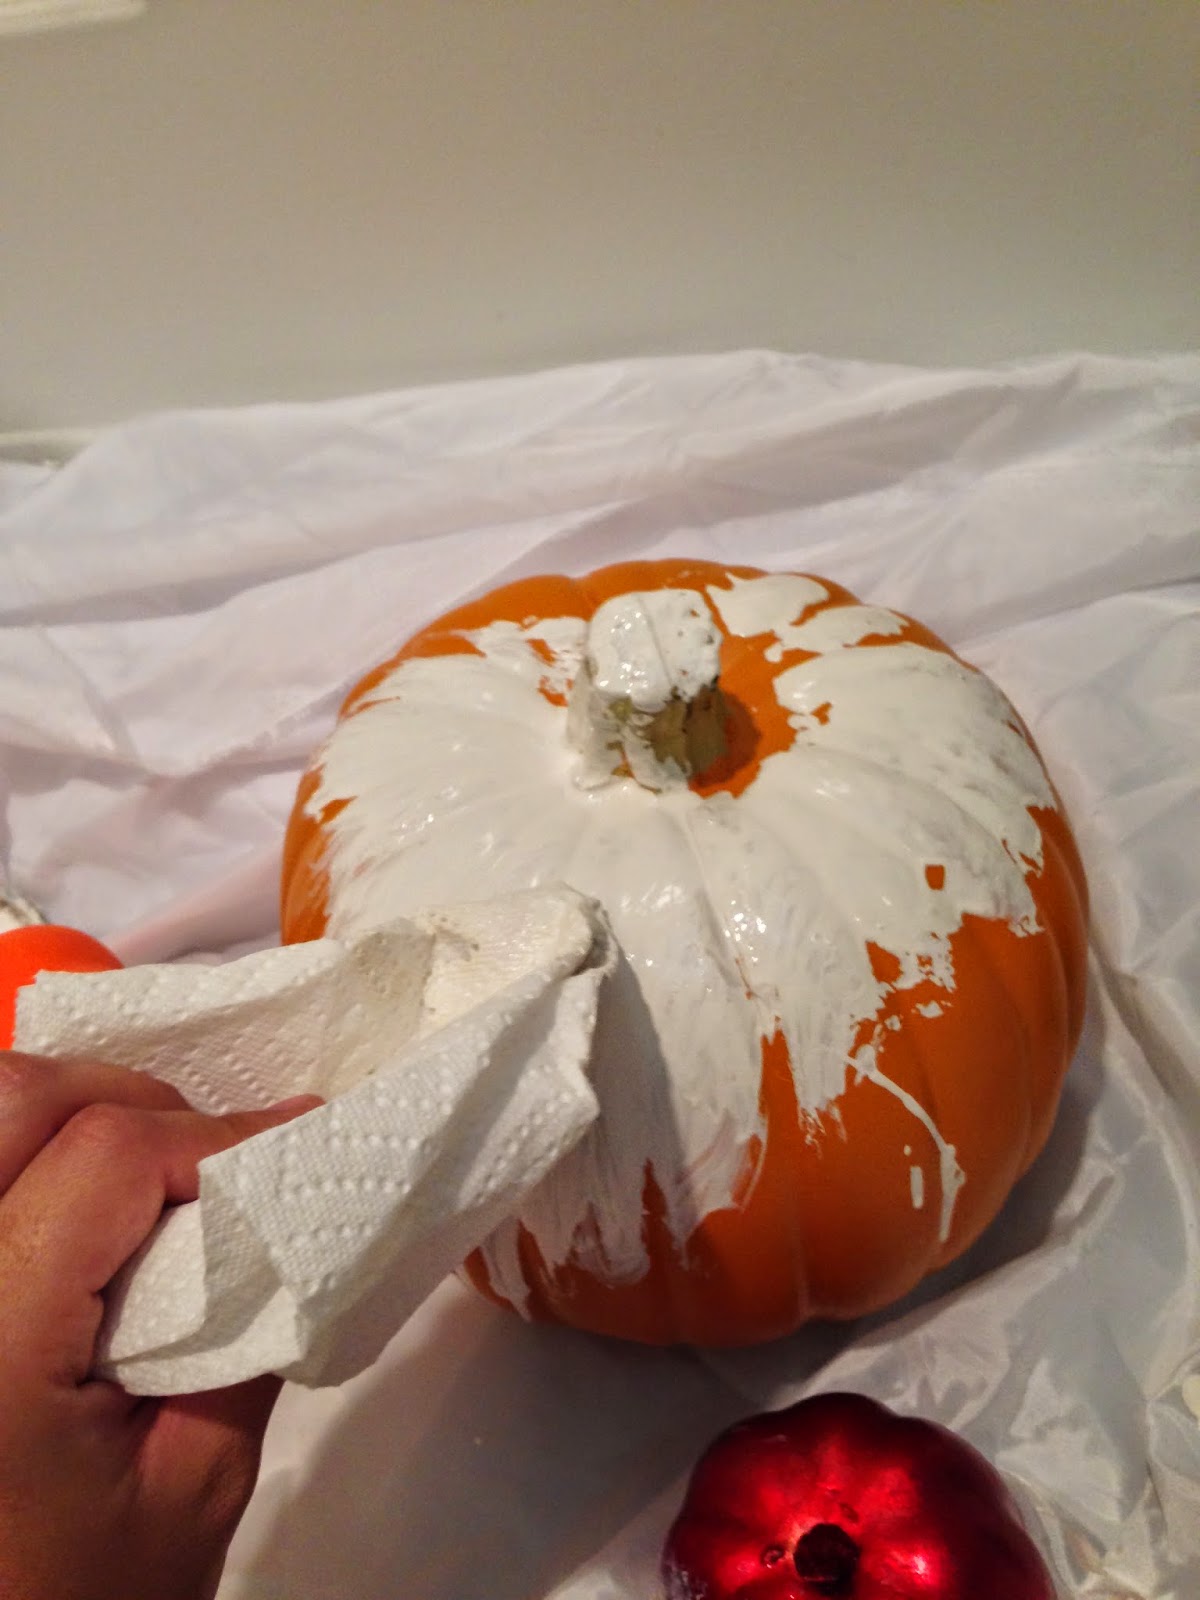
I also didn't have any paintbrushes, I guess I accidentally threw them away with the other project. I did have a roll of paper towels though! They were easy to paint with, and I only ended up using two paper towels to paint all three pumpkins.
The smallest pumpkin was surprisingly the hardest to paint! It had a cheap coat of almost glittery paint which kept trying to come out form underneath the primer. This primer though, a God send! I was able to turn cheap looking pumpkins into a matching set with just one coat of primer.
|
| They look pretty good if you ask me! |
Time for the cost breakdown:
Birds at $1 each - $6
Spiderweb - $1
Spooky net - $1
Large Pumpkin - $6.97
Medium Pumpkin - $1
Small Pumpkin - $1
Cermaic Owl Bank -$4.40 (on sale for 60% off at Michaels)
VOSS water bottle - had on hand
Sticks - had on hand
Primer - had on hand
An entire Halloween mantle for a grand total of $21.37, just $1.37 over my budget of $20! Score one for this mom! We now have some Halloween décor up to get us ready for the coming holidays.
What do your mantles / Halloween décorations look like this year? Are you going all out or keeping it simple?
I'm linking up with these parties this week:
Comments
Post a Comment